Tag Archives: TI

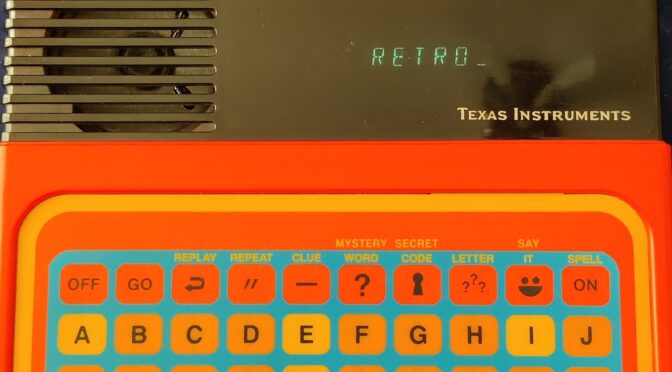
Speech output in the 80s – Speak and Spell

Loading

Many of the readers of this post may be familiar with the Hollywood movie E.T. (The Extra-Terrestrial), in our regions in the translated version: “E.T. – Der Außerirdische”.

At least the older readers will know him. The film was shown in our cinemas in 1982 and I had the opportunity to see it at the time. As a child, you (at least I) always immersed yourself in the stories and lived in them. Briefly told, the story follows a small alien who was accidentally left behind on Earth while his fellow aliens flew away in their spaceship, fleeing from government agents. So little E.T. in a shed where he was found by local children. They befriended him and helped him contact the spaceship. To do this, he constructed a kind of radio system from everyday objects. For example, the antenna consisted of an umbrella, a record player with a circular saw blade, a clothes hanger with a dinner fork, and a child’s toy that could produce synthetic voices. This toy is called “Speak & Spell” and was developed by the Texas Instruments company.

The Speak & Spell is a handheld children’s computer from TI (Texas Instruments) that consists of a keyboard, a display and a small speaker. The heart of the device is a speech synthesizer IC, which makes it possible to generate an artificial voice. An audio output similar to the human speaking voice is achieved via LPC (linear predictive coding). With an internal ROM and optionally also external ROM modules, various tasks (spelling, word guessing games, etc.) can be realized. Selection and entry are made via a keyboard.

The Speak & Spell children’s computer originally came from a three-part toy series with “talking” computers. There was also a Speak & Math and a Speak & Read. You can occasionally find collectors presenting their devices on online video platforms. The devices were initially sold in the USA, Great Britain and Japan. Depending on the country of delivery, there were also different ROM modules with mini-games such as Mystery Word, Letter or Secret Code. These computers were intended for children from the age of 7. Later, more language libraries were released in seven language variations. Among other things, there is said to have been a module for the German language.

The first Speak & Spell was introduced at the 1978 Consumer Electronics Show as one of the first portable devices with a visual display and pluggable ROM game cartridges. This model was also used in the film E.T. known. It differs from later generations of devices only in terms of the keyboard, which in the original version still consisted of “real” keys. The TMC0280 synthesizer chip works inside. This was developed by a small team of engineers under Paul Breedlove † (1941-2021), engineer at Texas Instruments in the late 1970’s. This development began in 1976 as a result of TI research on speech synthesis.

At the beginning of the 1980s, a revised version of the device came onto the market. Here the keys have been replaced by a membrane keyboard. A Speak & Spell Compact version has also been released. In this case, the optical VFD display has been dispensed with and the size has been halved. There was another edition in the late 1980s. This time the VFD was replaced by an LC display and the keyboard got a QWERTY layout. As part of the retro wave (my guess) the company “Basic Fun” brought the classic Speak&Spell back onto the market in 2019. It looks similar to the 80s version, but is technically up to date (everything is generated in a small chip that was bonded directly to the “mini board”). The version also no longer has connections to the outside world.

The following chips are installed on the mainboard of the version sold before 1980:

  • TMC0271 (microcontroller and VF display controller for 9 digits with 14 segments each)
  • TMC0530 (or TMC0351, TMC0352) 128kBit ROM
  • TMC0281 (TMC0280 series speech synthesizer IC)


The model that is in my collection is one of the versions sold after 1980. The following ICs are installed here:

  • TMC0271 (microcontroller and VF display controller for 9 digits with 14 segments each)
  • TMC0281 (TMC0280 Series Speech Synthesizer IC)
  • CD2304 and CD2303 (ROM)


The VF-display has eight digits with 14 segments each. The supply voltage of 6V is obtained from four C-cells connected in series. The 9V and 21V for the supply of the VFD and microcontroller is provided by a discretely constructed DC/DC converter, which is located on its own circuit board. The membrane keyboard is plugged into a 13-pin Flexiprint socket. There is a small speaker for playing the sound, or you can connect headphones via a 3.5mm jack. The sound is obtained directly from the synthesizer chip. In order to adjust the output impedance to the speaker, a small audio transformer has been installed right next to the jack socket. Another socket serves as an external power supply. A trimming potentiometer changes the playback speed/pitch of the audio output.

The TMC0280, later called the TMS5100, is the single chip speech synthesizer that used a 10th order LPC model using pipelined electronic DSP logic. The phoneme data for the spoken words are stored in PMOS ROMs. The enormous capacity of 128 Kbit was the largest ROM that was still affordable at the time. Additional memory module cassettes can be inserted via a recess in the battery compartment. The contents of the memory modules can be selected using a key on the keyboard. The data rate of the audio output is slightly less than 1kbit per second.

DC/DC Converter PCB


Small craft project for the summer time

Loading

solar module

As a mini – craft project for the summertime I call the following tinkering. A small monocrystalline solar module called “SM 6” from a well-known large electronics distributor starting with “C” and ending with “d” plays the main role in the project. The module has a nominal power of 6Wp with a maximum current of 320mA. The rated voltage is 17.3V. The open circuit voltage is 20.8V. The silicon cells are embedded in an EVA (ethylene vinyl acetate) plastic sheet and are UV and moisture resistant. The whole module is about 25cm x 25cm in size. It is thus ideally suited to provide the power to power USB devices. For example, I thought about WIFI IP cams. It should also be possible to charge smartphones or tablets.

In order to be able to do this, the operating voltage of the USB standard (5V) must be generated from the rated voltage of the photovoltaic cell. You could do that easily with a 7805 controller and convert the difference into heat. But this is the least efficient way to get the panel’s energy into a cell phone. Firstly, the internal resistance of the panel depends on the light intensity, which has a major impact on the efficiency of unmatched load resistors. On the other hand, a series regulator is a power shredder, since the difference between input voltage and regulated output voltage is converted into power loss, ie heat, during the flow of current. Here you are better served with a switching converter (buck converter).


In a simple laboratory setup, the behavior of the panel can be examined. For this purpose, the open circuit voltage of the panel is measured at different illuminance levels. Subsequently, the panel is loaded with different resistance values ​​and the current through the load as well as the voltage at the panel are measured. The measured values ​​are recorded and the Ri (internal resistance of the source) is calculated. The following circuit diagram shows the measurement setup:
measurement setup – schematic
The ammeter is an Agilent and Voltmeter Keithley 2701 table multimeter. These gauges can both be controlled via SCPI commands. The interface is a LAN port. This makes it easy to implement an automated measurement process via a PC and a suitable script. And since Matlab offers a very convenient way to script, it’s also used right now. In order to be able to measure in a laboratory and have approximately the same environmental conditions, a table lamp with halogen bulb is used instead of the sun. The brightness of the lamp is easily adjusted by supplying it with a laboratory power supply of 0-13V. Of course, the laboratory power supply can also be controlled by Matlab.
measurement setup with lamp as “sun”

The lamp is placed at a distance of 25cm in the middle of the panel. In order to get a feeling of which illuminance is achieved with the lamp, a reference measurement is taken with a luxmeter. That is, the lamp goes through the power ramp of 0-13V and the lux meter measures the illuminance at a distance of 25cm under the lamp. The whole thing is resolved in 0.5V steps. This results in a curve that looks like this:

Voltage on the lamp results in illuminance

Now the measurement can begin. Resistors are manually connected to the panel as a load resistor and current and voltage are measured at each brightness level. There are eleven load resistance values ​​ranging from 4.7 ohms to 220 ohms connected in sequence. An idle measurement is then of course made without load resistance. The following graph shows the calculated internal resistance for two loads of the panel over the brightness curve of the lamp in lux and in the other graph over the voltage at the lamp (for better scaling). The internal resistance of a source is calculated from the open circuit voltage of the source minus the voltage under load, divided by the current. With the difference between the no-load and load voltage, the voltage drop at the internal resistance is obtained. Since the load is also known as the current, it is only necessary to use Ohm’s law to obtain the resistance value …

Internal resistance vs. illuminance

Internal resistance vs. Voltage on the lamp

Since some clarifications about the behavior of the PV cell have now been eliminated, I can briefly report on the structure of the voltage converter. As previously announced, a switching converter is the more efficient way to adapt the energy to the consumer. Here comes an LM2596S used. The LM 2596 is a “Simple Switcher Power Converter” that switches at 150kHz and can supply a load with 3A.) Here is an overview of the functions:

  • 3.3-V, 5-V, 12-V, and Adjustable Output Versions
  • Adjustable Version Output Voltage Range: 1.2-V to 37-V ± 4% Maximum
    Over Line and Load Conditions
  • Available in TO-220 and TO-263 Packages
  • 3-A Output Load Current
  • Input Voltage Range Up to 40 V
  • Excellent Line and Load Regulation Specifications
  • 150-kHz Fixed-Frequency Internal Oscillator
  • TTL Shutdown Capability
  • Low Power Standby Mode, IQ, Typically 80μA
  • Uses Readily Available Standard Inductors
  • Thermal Shutdown and Current-Limit Protection

(source: datasheet from vendor TEXAS Instrument)

With this switching converter and a few other components can quickly assemble a circuit and transform with the layout tool “Eagle” into a board. However, this circuit is so simple that it only works as efficiently as possible with the advantages of the LM2596, but does not perform any power tracking. This means that the load representing the circuit for the solar cell is not adapted to the internal resistance of the solar cell.


Circuit diagram of the DC-DC converter

From this circuit, a simple layout was created, a board etched and equipped. A USB socket on the output allows the direct connection of USB devices. To make the whole thing look a bit reasonable, I have donated the board still a small plastic casing …

measurement setup
Switchable load resistors
Layout on the computer
Foil for creating the printed circuit board
Etched PCB
Etched PCB
Finished circuit

Circuit diagram of the DC-DC converter

A simple layout was then created from this circuit, a circuit board was etched and assembled. A USB socket at the output enables direct connection of USB devices. To make the whole thing look a little sensible, I donated a small plastic housing to the circuit board …

Measurement setup
Switchable load resistors
Layout on the computer
Foil for creating the printed circuit board
Etched PCB
Assembled PCB
Finished circuit