![]()
The Nintendo company launched the Nintendo Classic Mini game console and put it on sale in 2016. It is a revival of the original 8-bit game console Nintendo Entertainment System from 1983 (release in Japan) and 1986 (release in Europe). The original NES console has sold around 61 million times and was replaced in 1992 by the SNES (Super Nintendo Entertainment System) a 16-bit console. The popularity of the Nintendo consoles is apparently so great that the new edition was sold out shortly after its release with a retail price of around 60 euros. Here traders sensed the big deal and offered the devices on Amazon, ebay and the like at sometimes horrendous prices. Even now, almost a year later, they are still not available for less than 100 euros. And Nintendo doesn’t produce any other units either. Instead, the same game began with the revival of the SNES series in miniature.

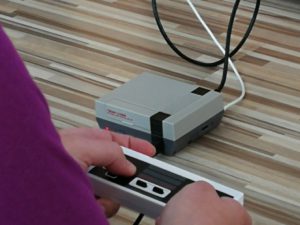
But there are other ways you can get a miniaturized version of this console for a lot less money. For a few euros you get a case called NESPI CASE, which corresponds to the NES CLASSIC MINI, but with one big difference: you can install the computer yourself in the form of a Raspberry PI. This opens up countless possibilities to use emulator software to recreate your own consoles using software. The NESPI case has an integrated 4 port USB hub and a LAN Ethernet connector that leads the connections of the Raspberry PI to the outside. Two USB ports are arranged in such a way that they serve as controller connections. The other two USB ports and the Ethernet connection are located under the device flap, where the game modules were once inserted. The device is equipped with a power switch with a power LED and a reset button.


The housing is supplied with pre-assembled adapter boards. The screws for mounting the Raspberry Pi and the housing shells are also included in the scope of delivery. A small included Phillips screwdriver and a piece of paper with assembly instructions make things even easier.

The LAN and USB ports of the RaspberryPi are routed to the outside via the cables and plugs on the adapter boards. Once the plug connections have been made, the RapsberryPI board can be screwed into the housing. Optionally, a 5VDC fan with the dimensions 30x30x10mm can also be attached to the housing cover using locking lugs. A two-pole pin header is available on the circuit board for the power supply of the fan. Once everything has been installed and connected, the upper part of the housing can be screwed on.

The software can now be set up. I prefer the images from retropie or recalbox. More information can be found on the relevant websites. Once the desired emulators have been set up, you only have to transfer the game files, the so-called “Roms”, that is, binary copies of the game modules of the original hardware in a .bin or .rom or .iso file etc. to the SD card or USB Copy the stick and integrate it into the “EmulationStation”. And you’re ready to go. The USB controllers in the NES look are also available for just a few euros from China …

