
Sony RX100 digital camera (and its repair)
![]()
 The Sony RX100 digital still camera with its 20.2 megapixel EXMOR CMOS sensor impresses with its excellent image quality and compact design. The sensor size of one inch and the front Zeiss Vario Sonnar F1.8 lens are also responsible for the good image results. With 10x6cm and a thickness of 3.6cm, the camera is still suitable for pockets. (Although I would not recommend it). The 3.6x optical zoom lens is retracted when it is switched off and extended when in use.
But after some time and a number of in´s and outs of the optics, it may – or better – it will come to a situation where the optics refuse to serve. This manifests itself in different ways. Either nothing happens after switching on, the optics do not move and only the message (“Power Off and on again”) appears on the display, or the lens moves out a bit and then back in again. Now you could assume that the camera has mechanical damage, the sliding surfaces inside the optics are dirty, or something is bent or warped and jammed by a possible fall. But that’s usually not the case. In this case, the camera has never been subjected to strong mechanical, thermal, etc. stresses and there is still an error. If you do a little research on the Internet, you will find some repair tutorials where you try to clean with some paper strips between the slide rings of the optics etc. No reasonable information was found. So I have no choice but to look for the cause of the problem myself. And it was found quickly. After opening the device and slightly lifting the rear housing cover, the object suddenly extended again. If the lid was replaced, the problem was there again. So there had to be a contact error somewhere. In the following lines I present my way to a functioning camera:
 After loosening the screws and removing the plastic base plate, the rear cover can be removed with the control panel and the monitor.
 The Flexprint for the screen and the one for the control unit can be released, the small speaker can simply be hung up. Now the battery can be inserted and the camera can be switched on again. In this case the lens opened and extended again correctly. So it’s really a contact problem. But where? I tried to put light pressure on the Flexiprint, which supplies the mechanical part of the optics. (Not the one that leads from the sensor to the mainboard.) With this slight pressure on the Flexprint, the device was switched on again and lo and behold -> hit. The optics didn’t move. That could also be understood. So this Flexprint seems to have a line break at the kinks. Apparently, this print is mechanically stressed due to the construction and retraction of the lens and thus yields and breaks at some point. (Perhaps also planned obsolescence). Anyway, I looked for a replacement on the net, found it and after a week of waiting the new Flexiprint was already delivered.
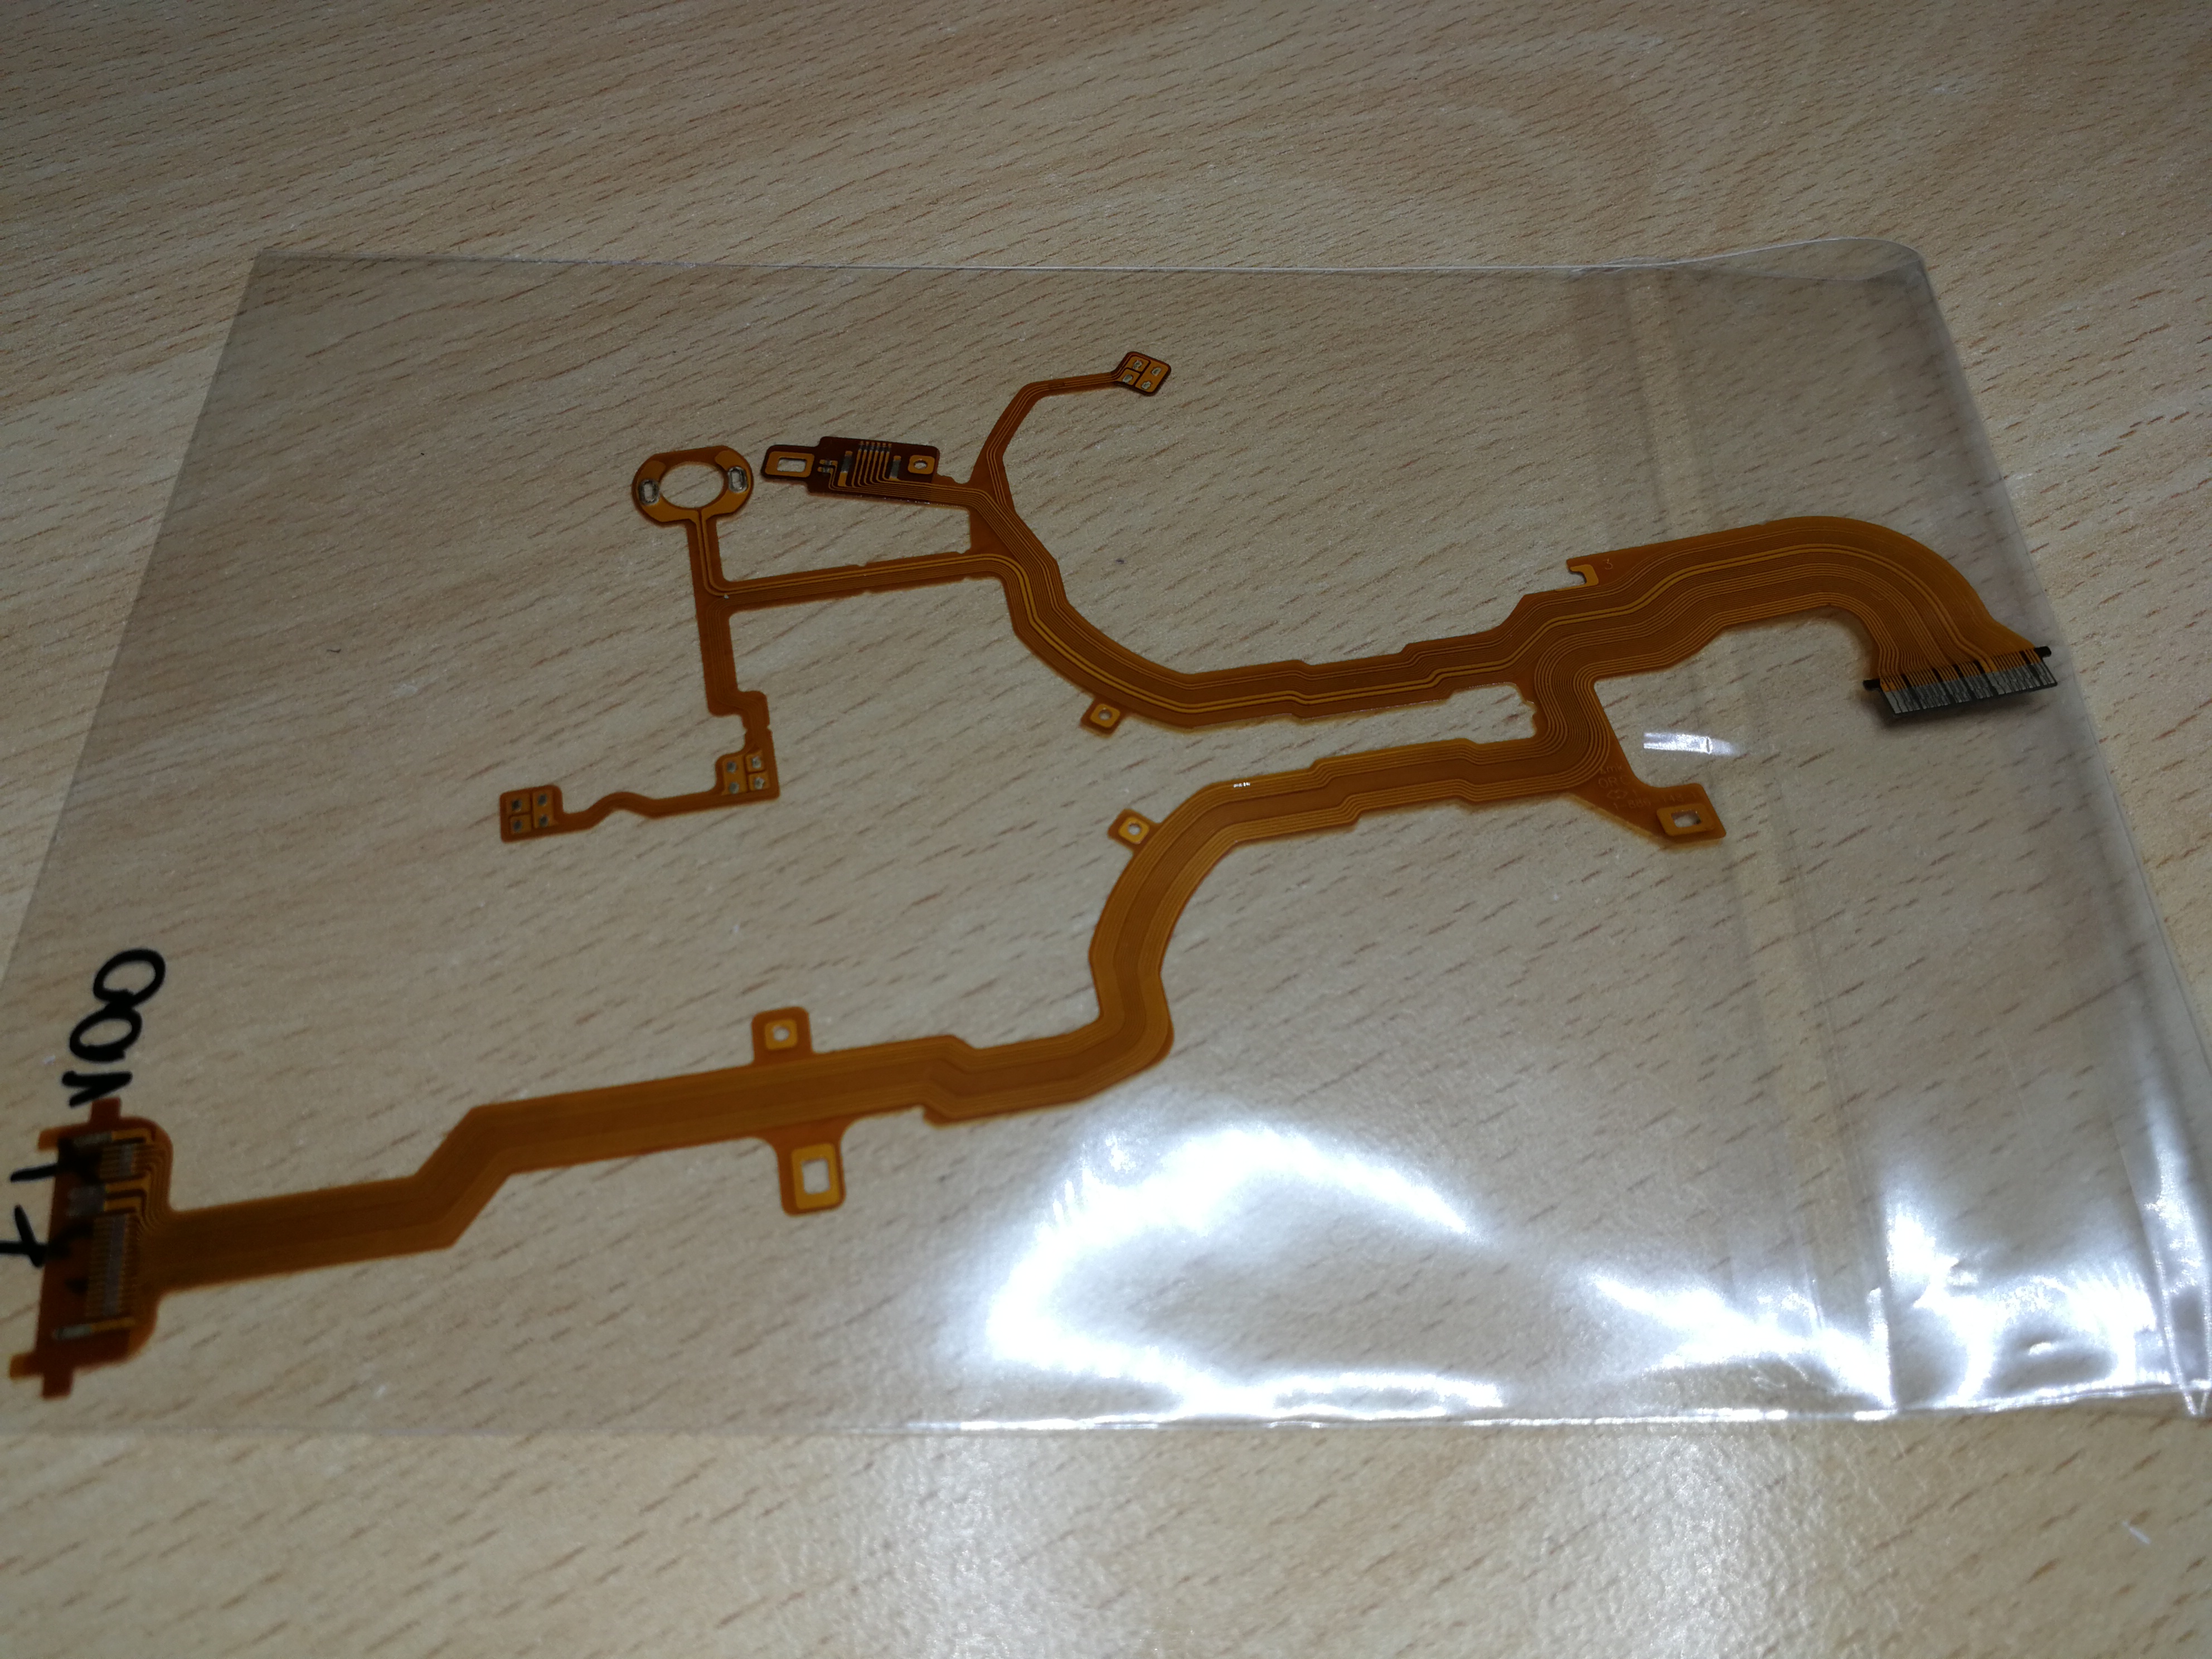 The new print for the optics is sold without any components. This means that from here a little experience in handling soldering tools, SMD components and flexible circuit boards is required.
 The optics must be exposed and removed. To do this, the mainboard must be detached. (three screws in total). Then carefully remove the black film from the back of the optics. (Be careful with all flexible cables) Once the film is off, the flexprint to the sensor can be unplugged.
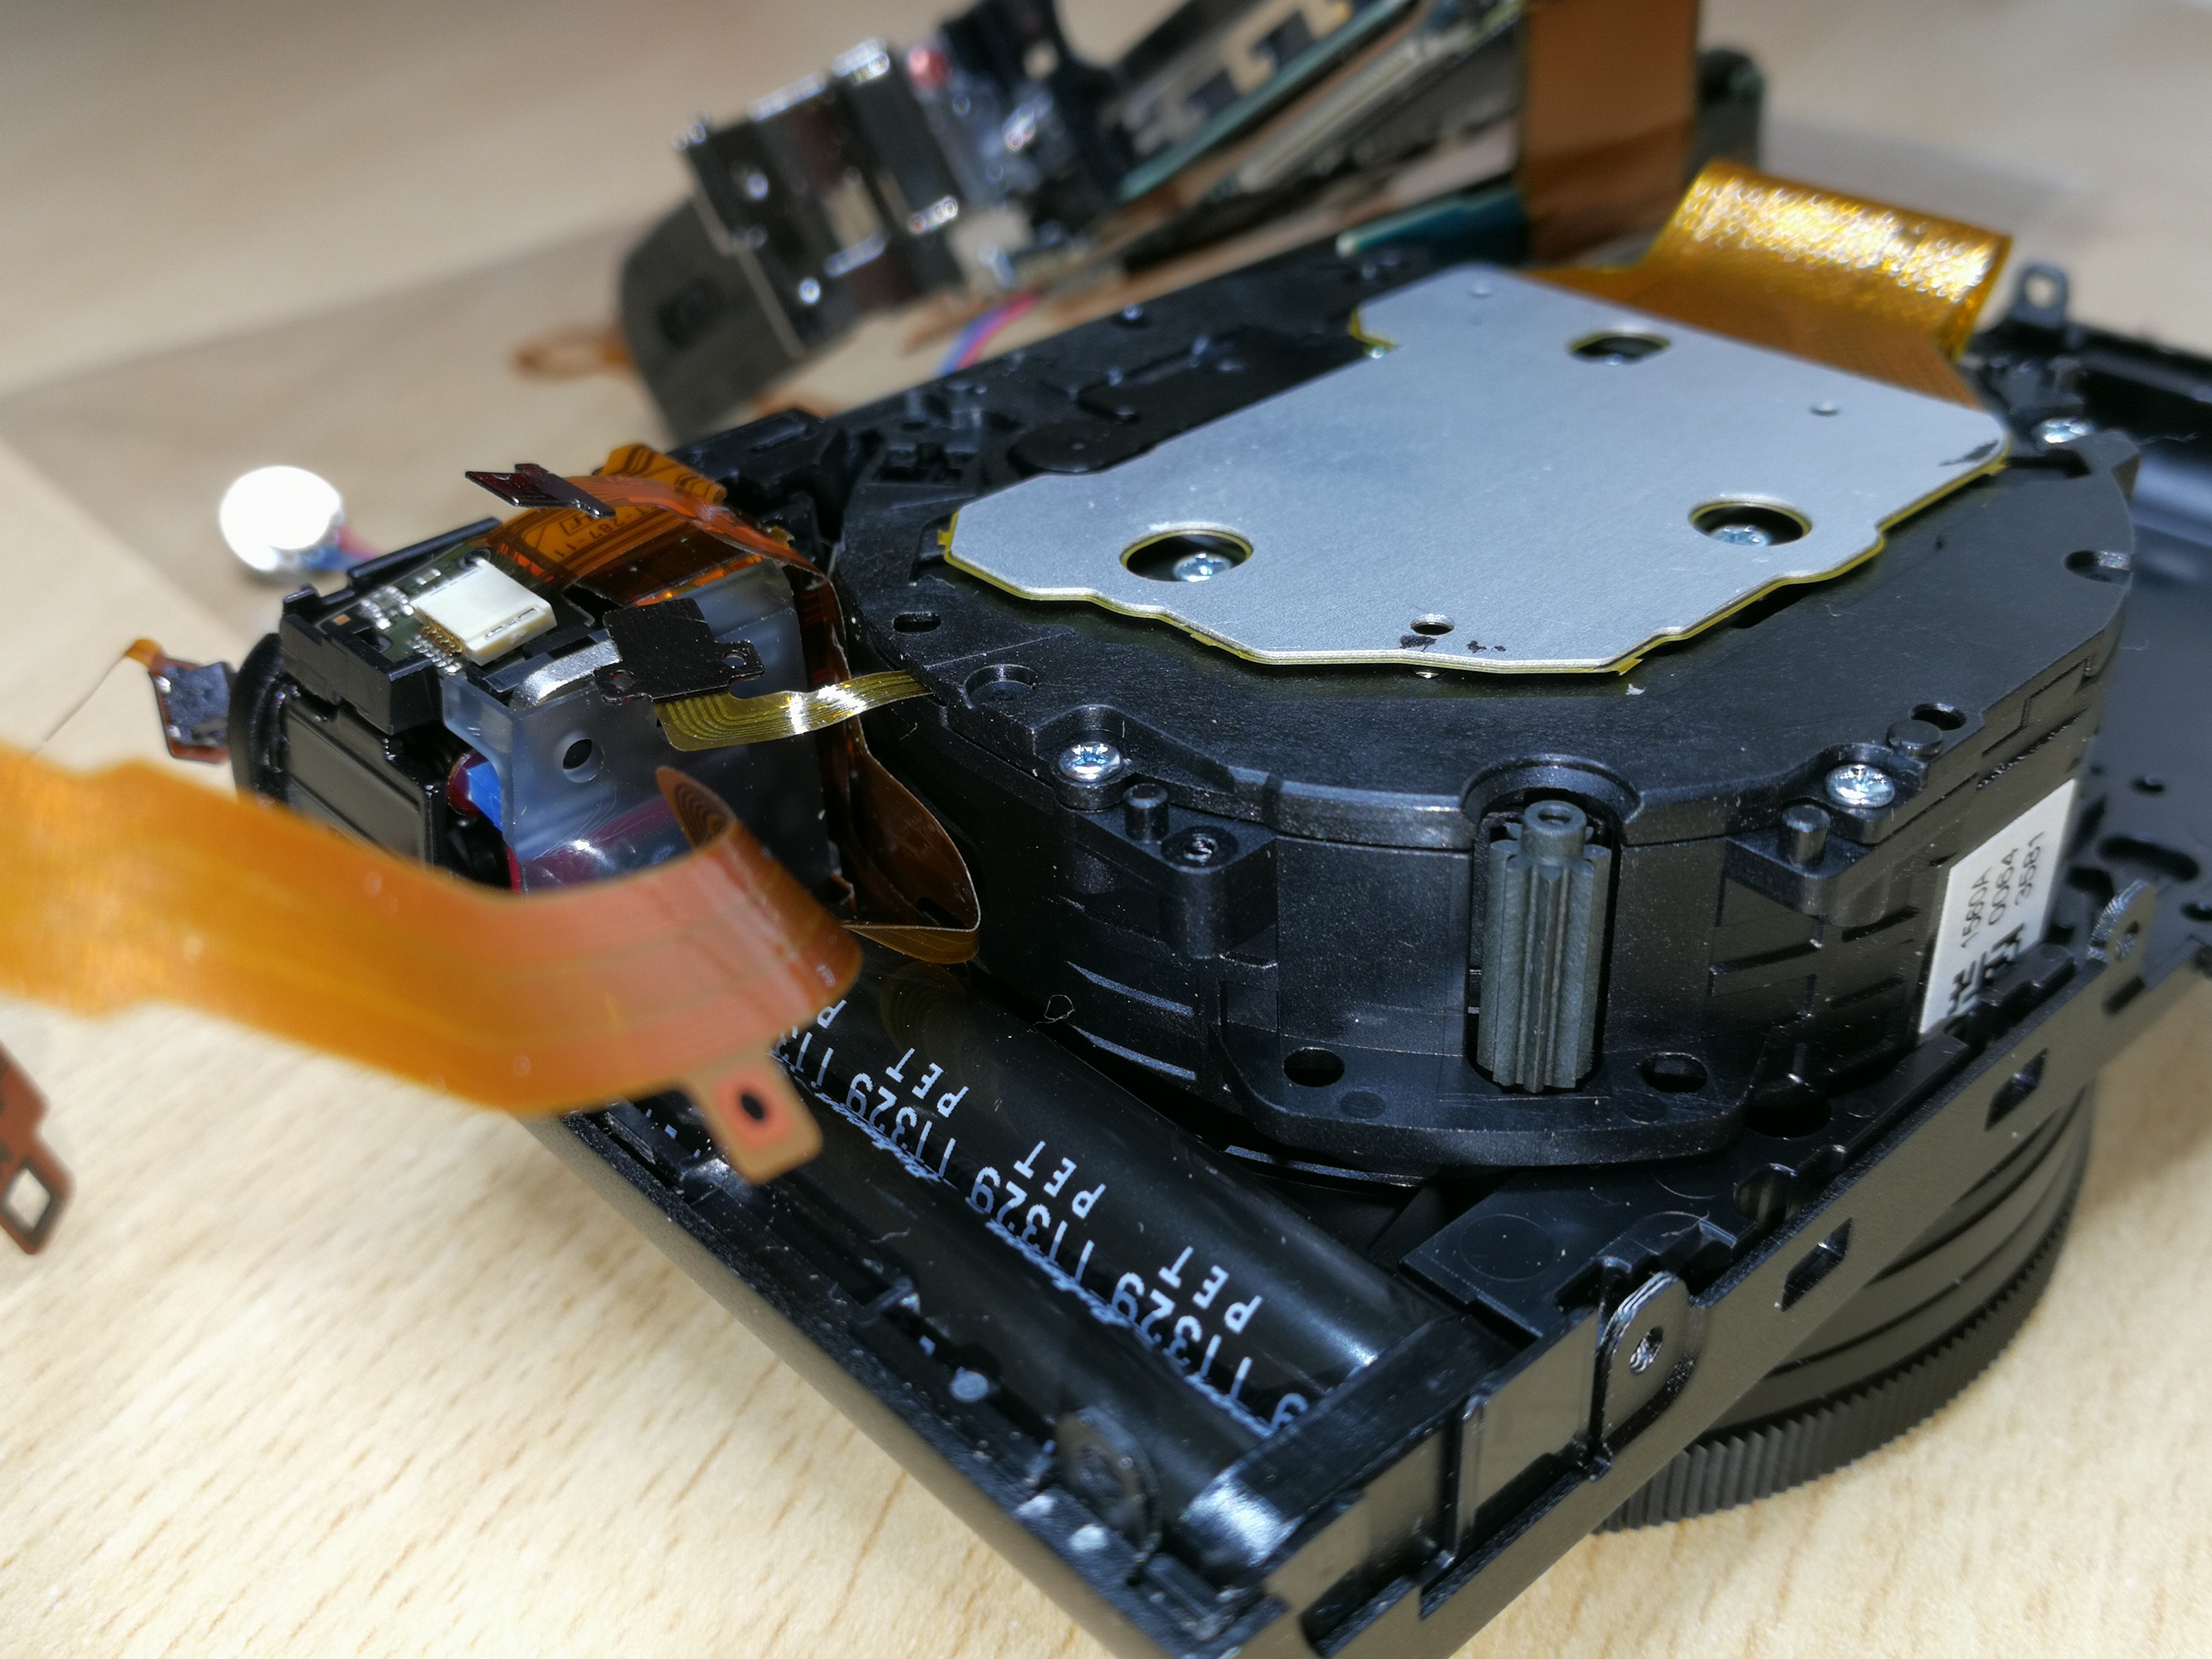 Next, the motor unit is released and the motor is separated from the lens housing.
 There are some components on the print, such as plug connections and small fork light barriers, which are installed in the lens (lens position) and in the motor unit (two pieces as incremental encoders and for determining the direction of rotation). These are held in place with small metal brackets and must be released before removing the lens unit.
 The lens, drive unit and mainboard are removed. All plug connections between the optics and the drive motor must be disconnected.
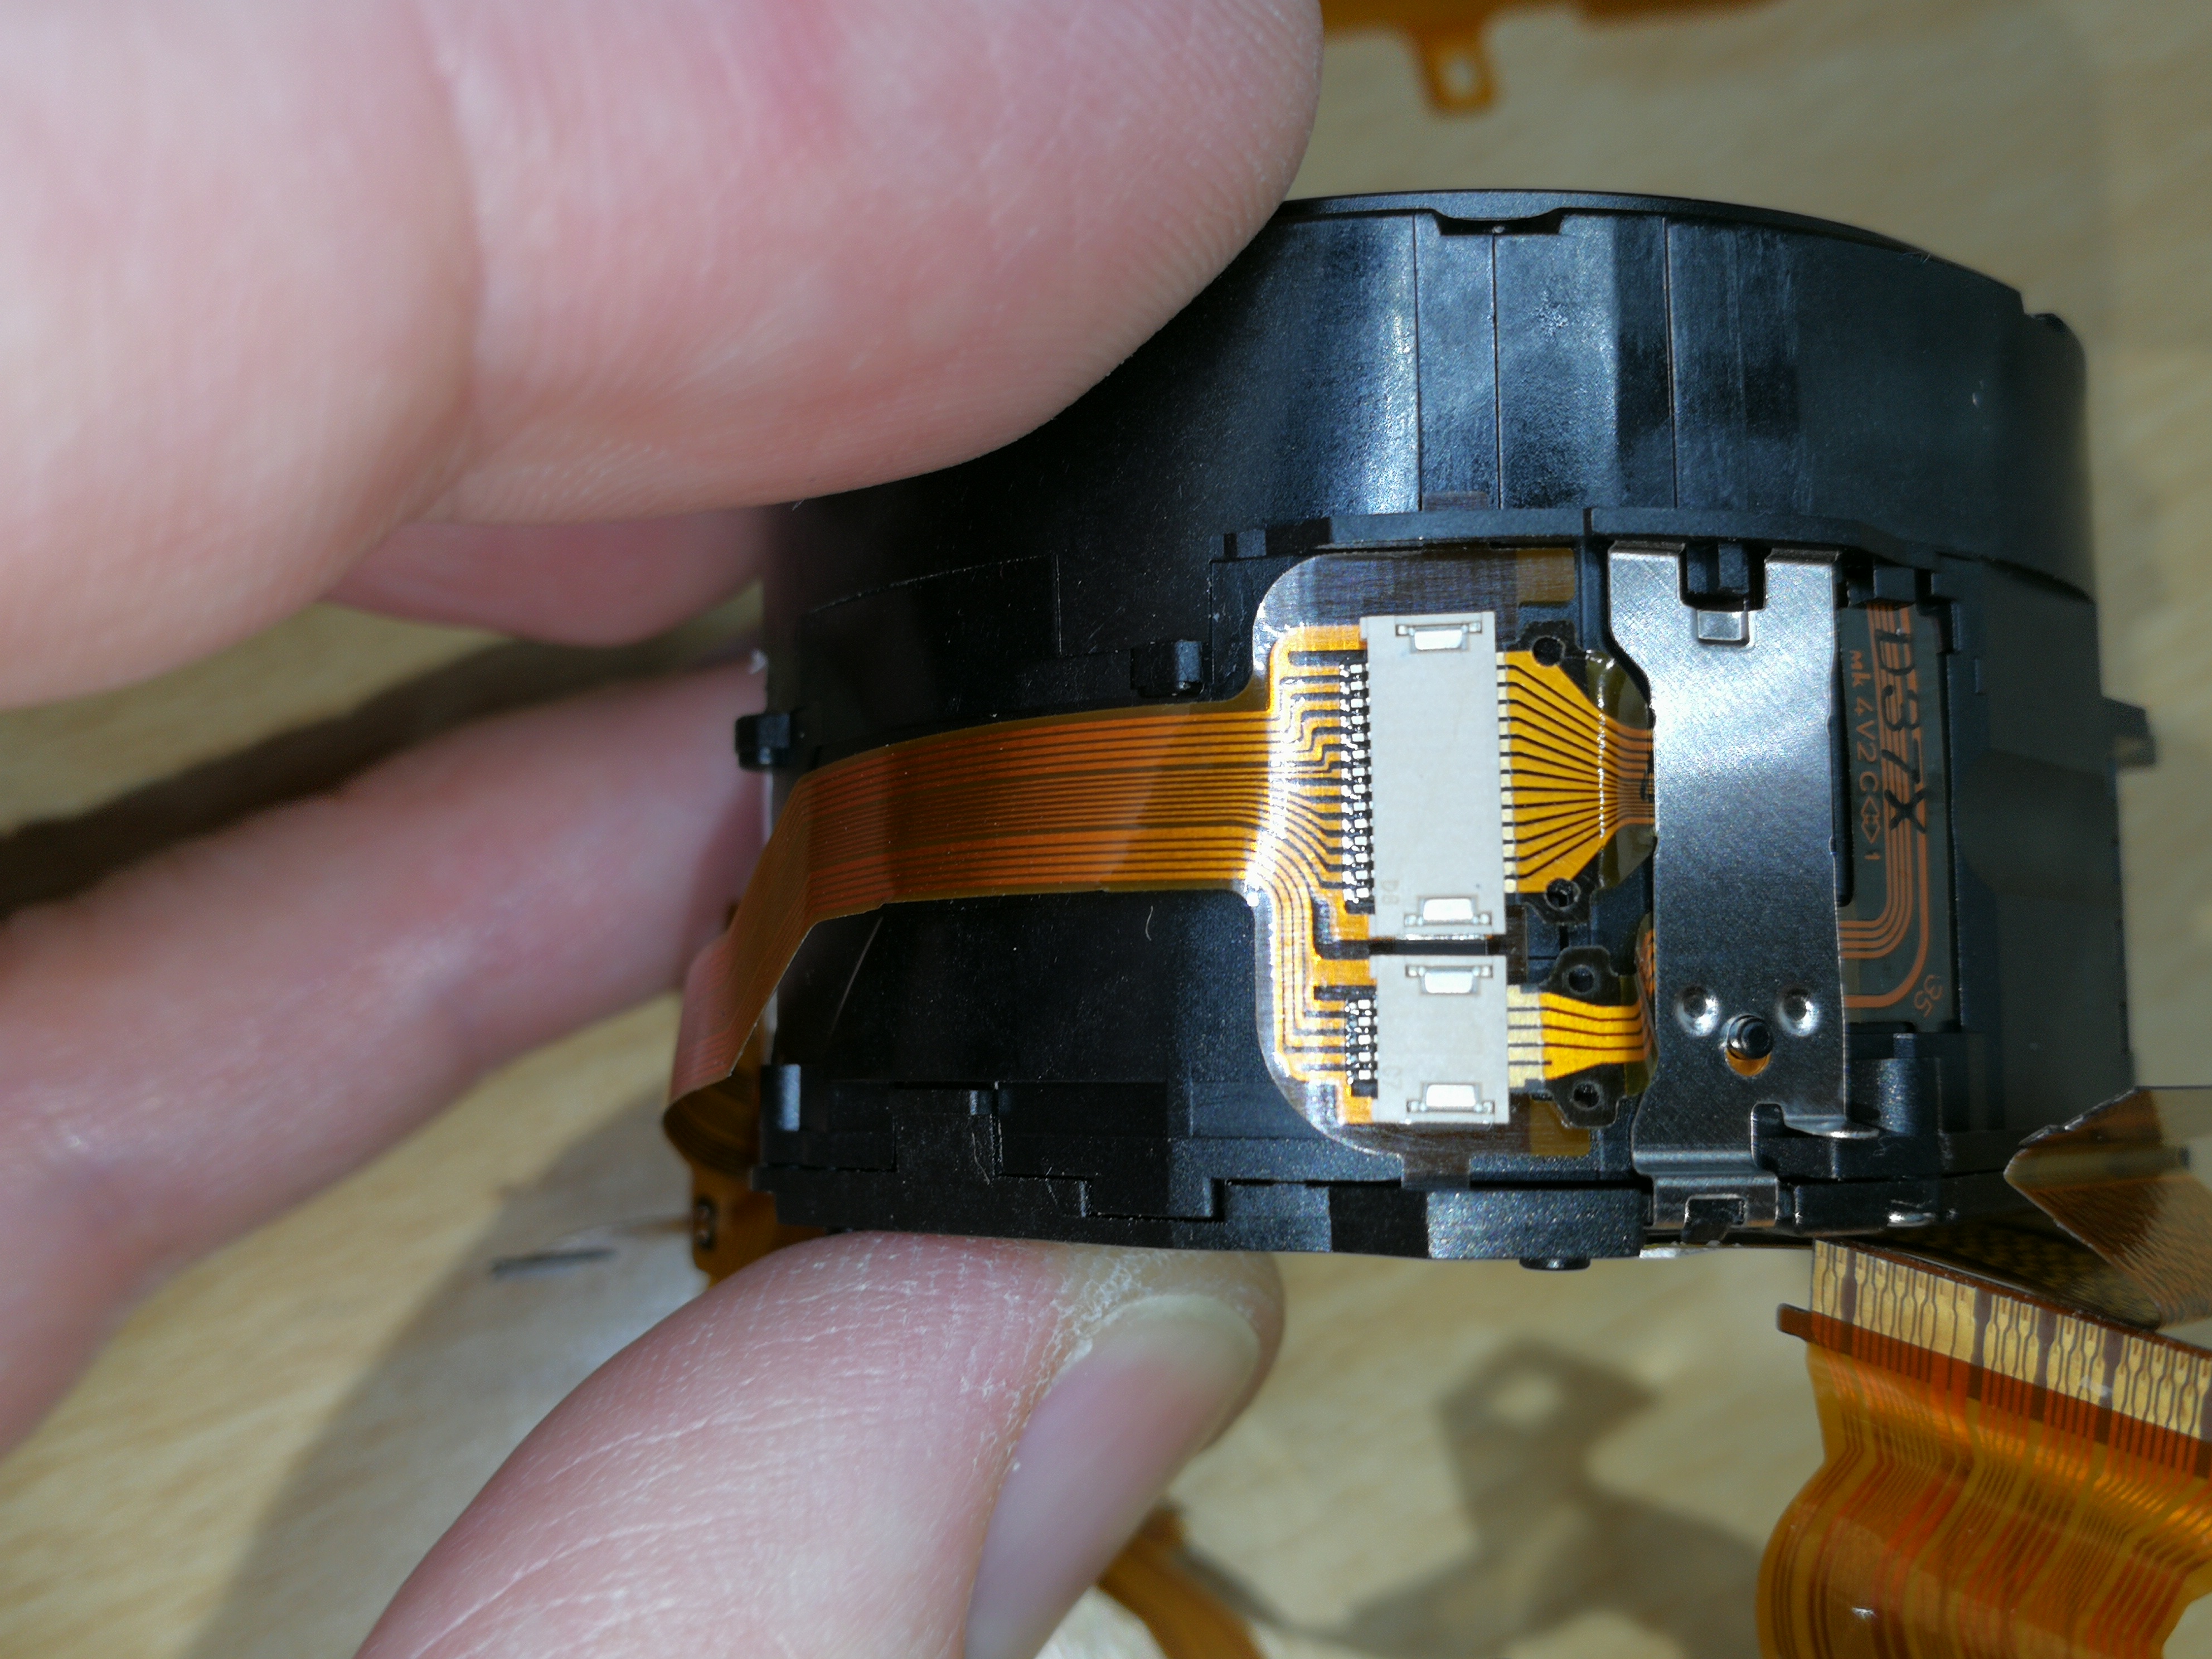

The motor unit can now be separated from the lens. The Flexiprint is attached to the lens housing with tape and small hooks. These have to be solved.
 Now disassembly of the motor unit continues. As previously mentioned, there are two fork light barriers in the plastic housing of the motor gearbox, which are also held in place with a clamp. This can simply be clipped out. To complete the removal, the motor must be unsoldered. Now the Flexiprint is free and the delicate step can begin.
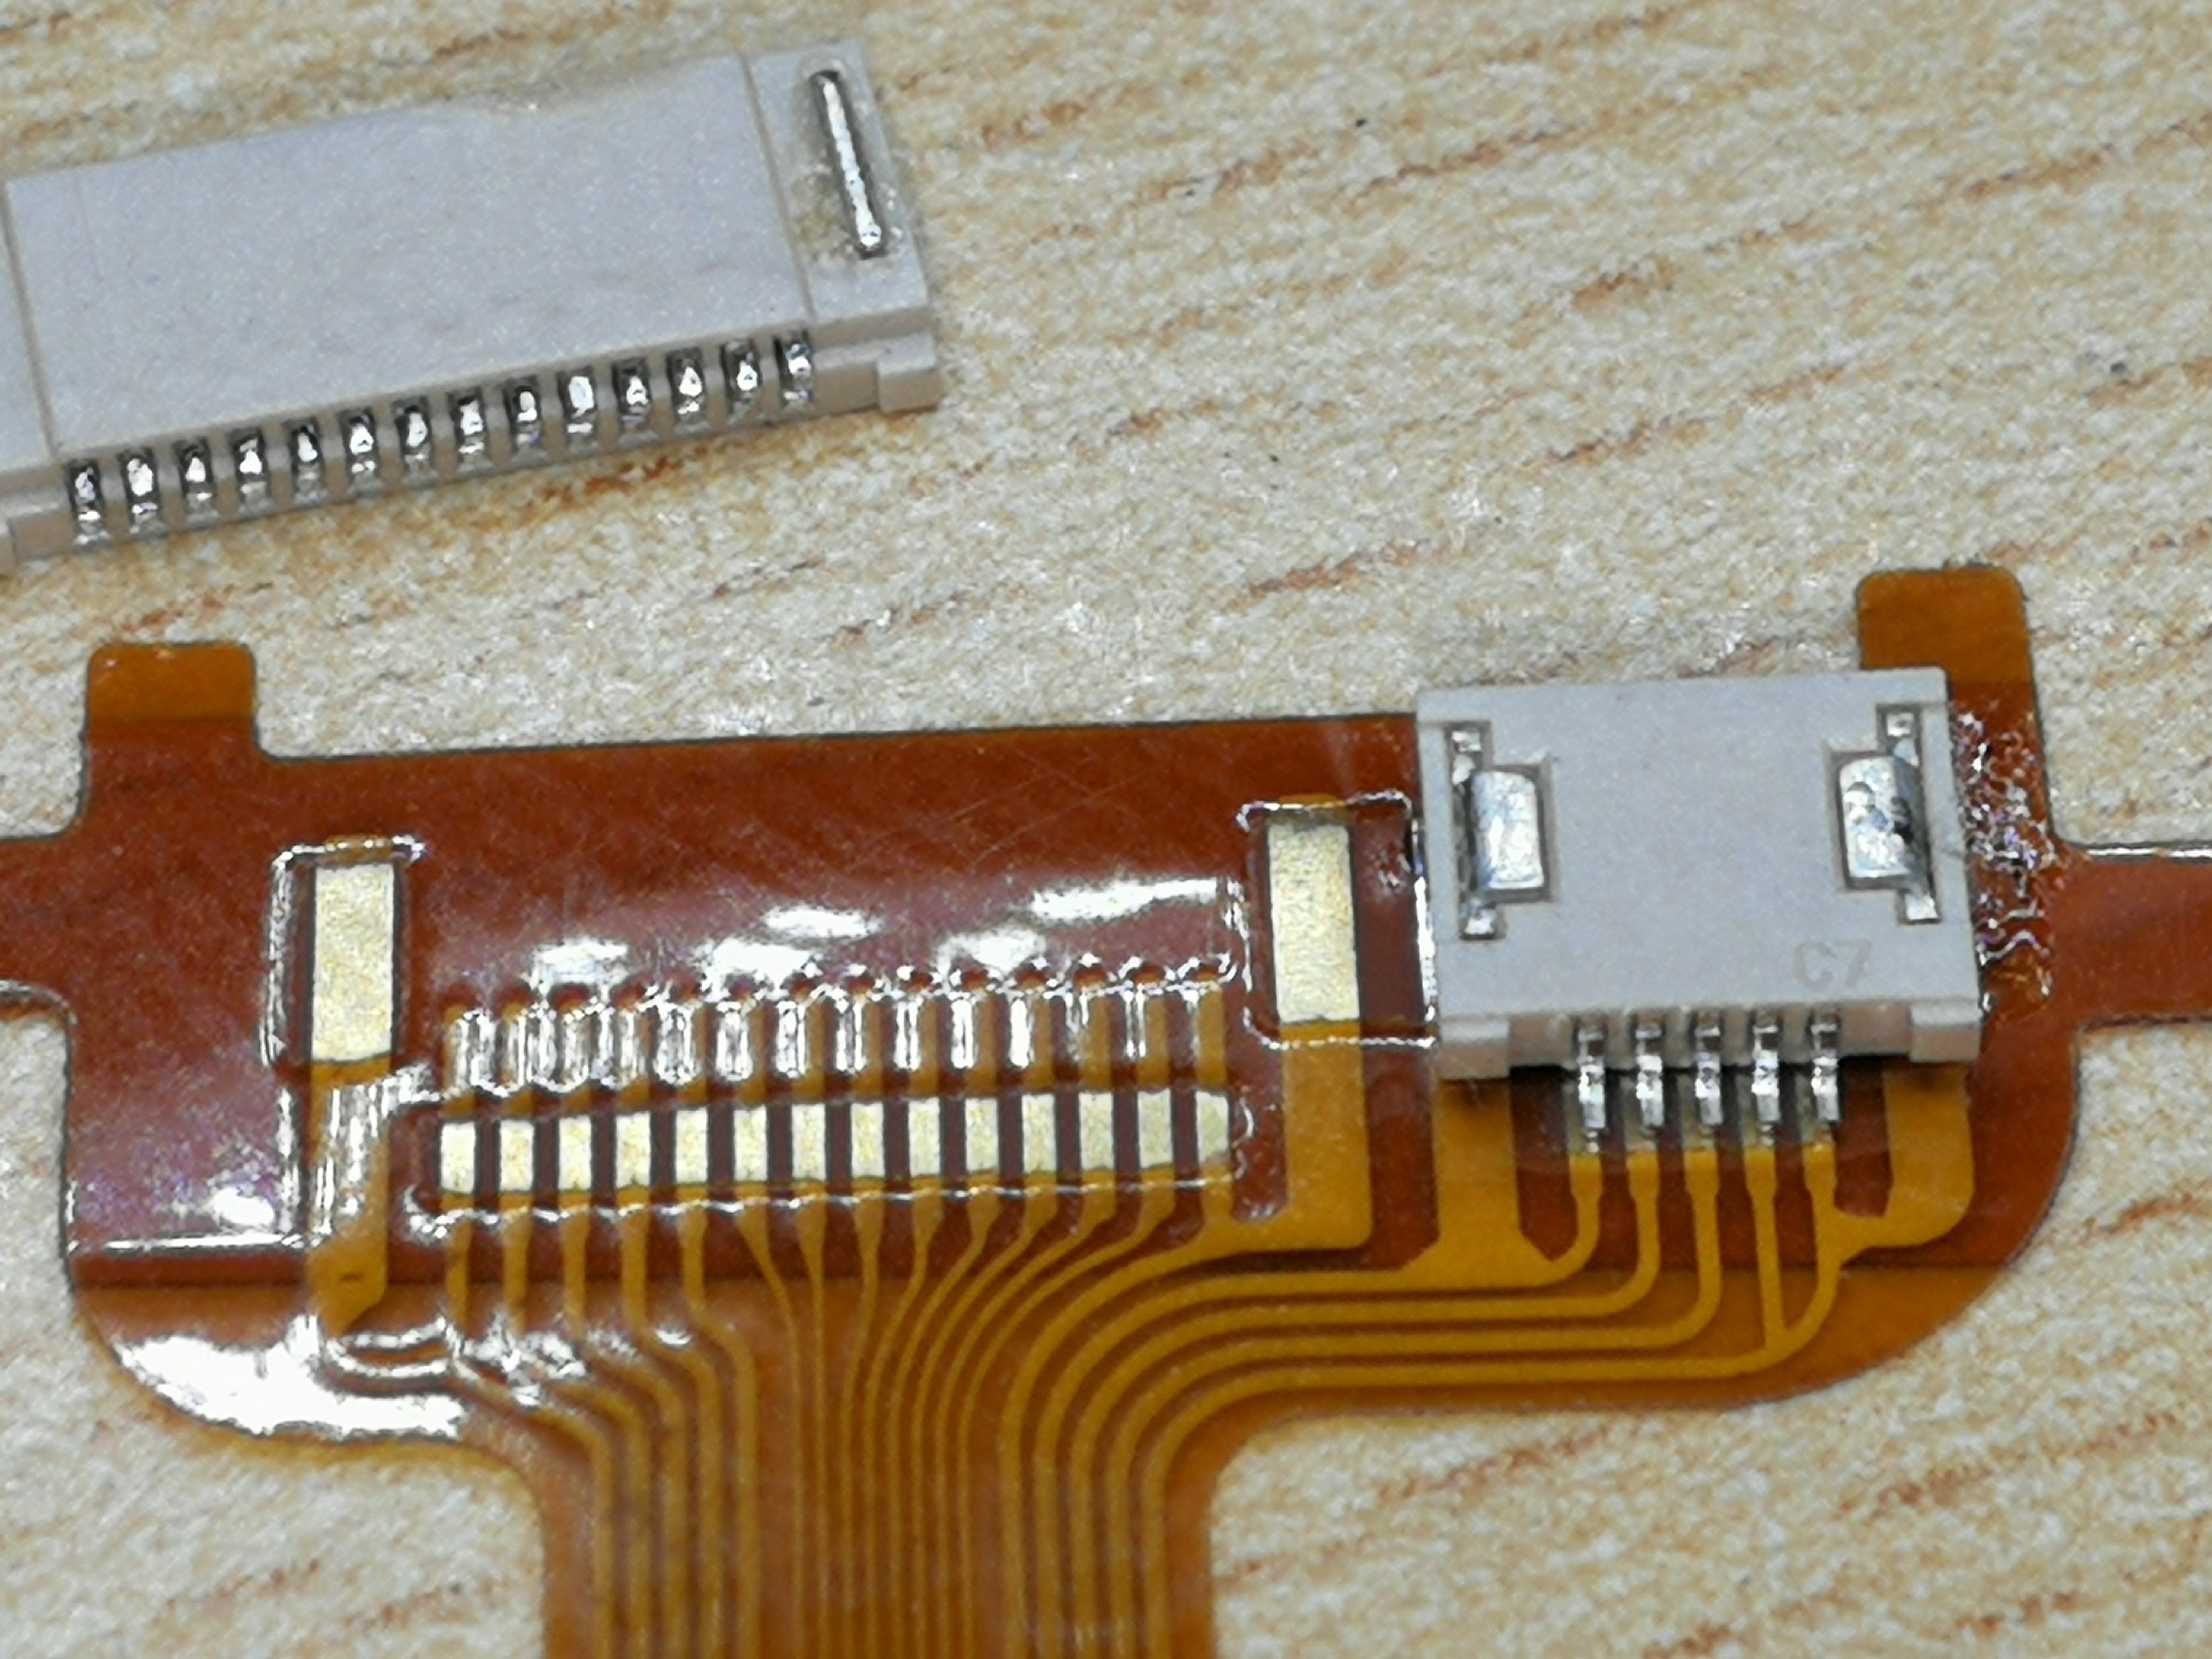
The small SMD connectors must be unsoldered from the old print and reattached to the new print. This work requires cleanest hand towels, as the small plastic housings can be easily destroyed when unsoldering. I recommend here to heat the print only from the bottom, and then lift the plug off with tweezers. Otherwise you run the risk of deforming the plastic of the connector too much heat. If this is successful, the plugs can be soldered onto the new Flexprint.
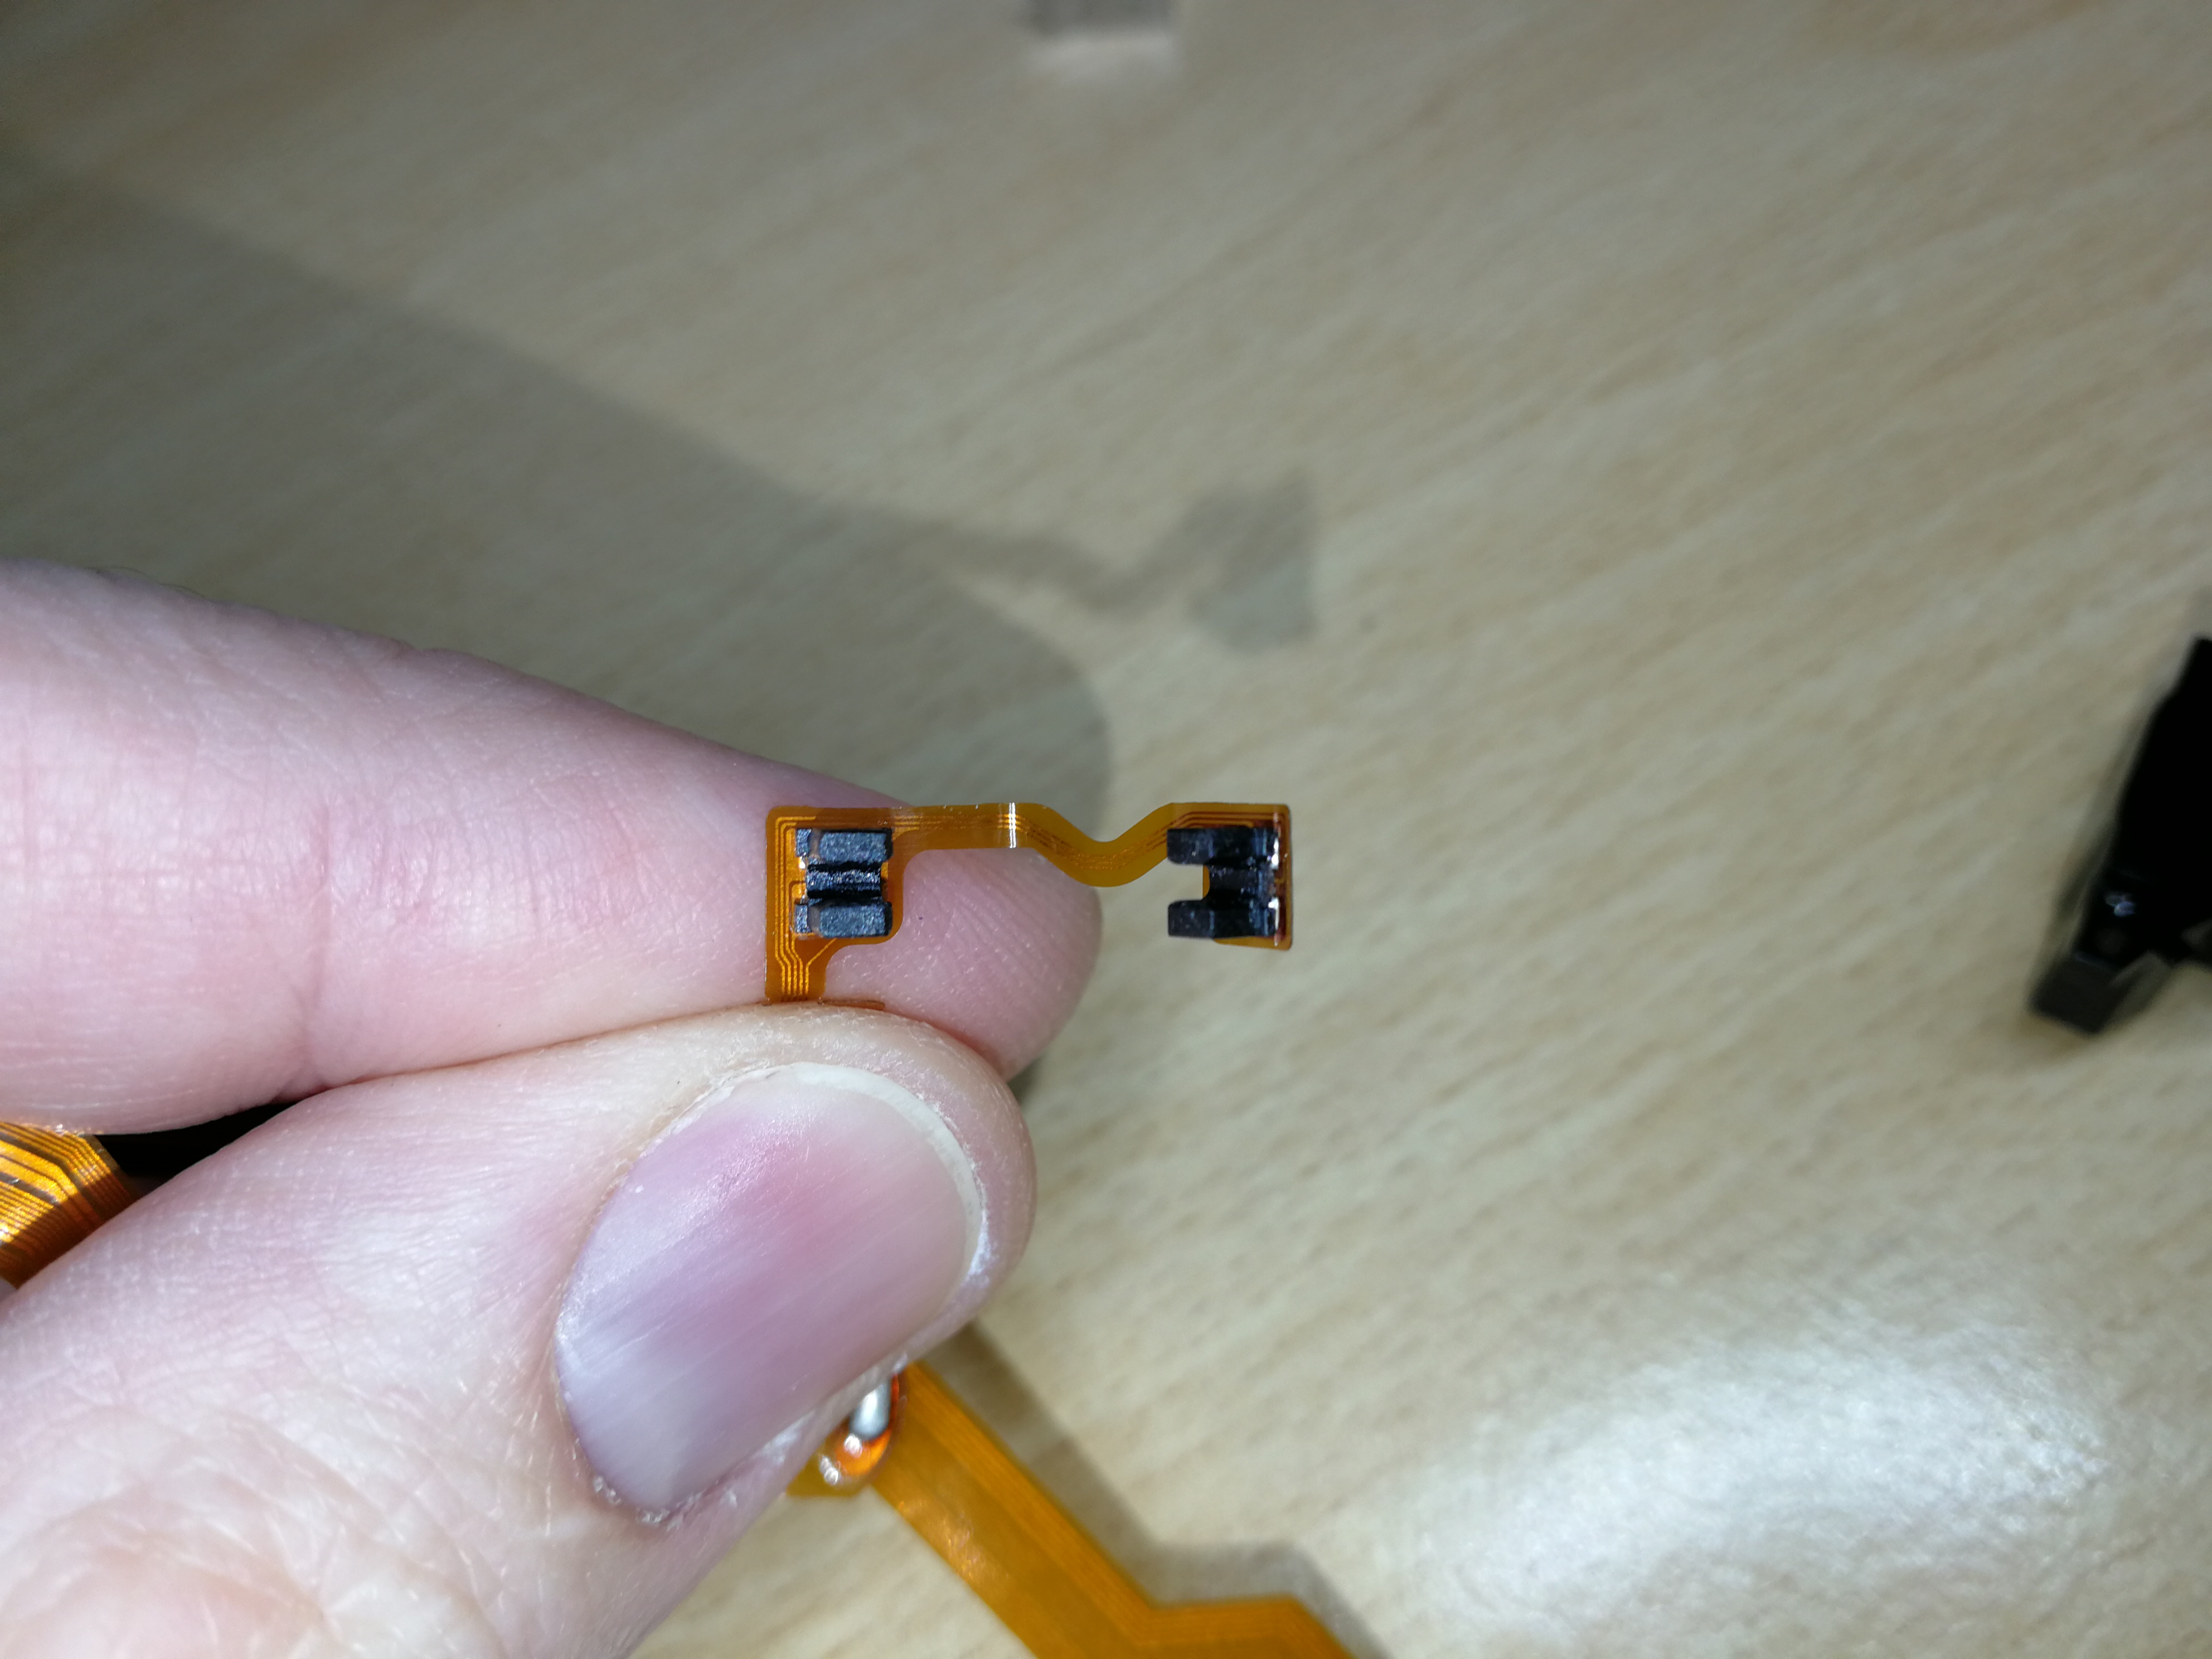
The same work is also to be done with the fork light barriers. Then only the contacts of the motor have to be soldered to the designated positions in the flex board.
 If that worked, the assembly can be done in reverse order. When bending the flex board into the correct position, you can orient yourself on the old board. Then the installation should not be a problem. A function test should be carried out before attaching the rear wall of the camera (rear cover). The lens must extend and retract without a monitor or control panel. If that also works, then it can be finalized. In my case, the repair was successful. Let’s see how long it takes for another conductor to break in the flexible PCB …


6 Responses
Does this problem persist across the whole rx100 range? Or only the first one pictured?
i only had to fix a few devices of this series
“Its”, not “It’s”, in the title.
thank you for the comment.
everybody is welcome to correct the english translation of my blog.
most of the translation is done automated by different services and i guess they do a good job, but are not perfect…
hello.
where can I find the same explanations to change my Cmos battery in my RX 100 III?
Thank you very much for this guide. I have a RX100m2 where the control ring encoder has stopped working. This will be very helpful to me in knowing how to disassemble and, I hope, repair the camera. Mike